As promised, today I have been doing some baking for Easter! I don’t think I have had soooo much fun in ages. There are 2 reasons for the baking: 1. it is my niece and nephew’s 1st birthday tomorrow and I promised to make some biscuits for the party and 2. a competition! The Pink Whisk has teamed up with Two Little Fleas to get people do some Easter-inspired baking. So I thought I best give it a go.
I am not usually one for doing fancy things. I like to bake something and eat it! This time though I felt up to the challenge. No work, the step children were away with the grandparents until later on…the day was mine! So let’s get started!
Meringue eggs with chocolate filling
I am really into making meringues at the moment. It took a while to get the hang of them, but I feel I have really figured it out! The recipe is easy. Double the amount of caster sugar to the amount of egg whites. I have started buying Two Chicks Egg Whites rather than using lots of egg whites and wondering what to do with the yokes! It is great, cheap and lasts! By heating up the sugar in the oven, it helps it dissolve better in the egg white. So whack the sugar in a heat proof bowl, bung it in the oven at 200°C and in the mean time whisk the eggs up with an electric whisk. Don’t bother trying to do it with a hand whisk…you’ll be there forever! When it is nicely whisked (turn bowl upside down…it shouldn’t fall out!), take the sugar out of the oven and turn it down to 100°C and add it one spoonful at a time to the whisked egg whites. Eventually it is all in and will create peaks. Colour them with food colouring and put it in a piping bag. Make small meringues (about 4cm in diameter), dust with cocoa powder and put in the oven for around 30-40 mins. I’ve found when they start to crack on top and you can peel them off a silicon baking sheet (I love them!) they will be ready.
When cool I stuck them together with some melted chocolate mixed with double cream. Done! Unfortunately I can’t try them out as I am allergic to chocolate (I know!)…but others will enjoy I am sure!
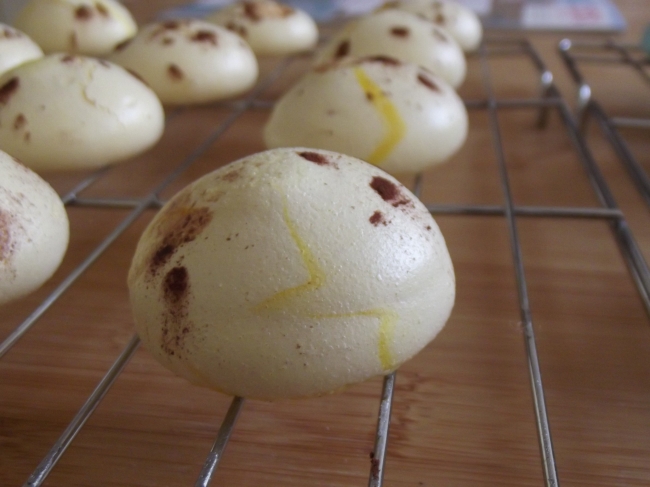
Yellow meringues with cocoa powder
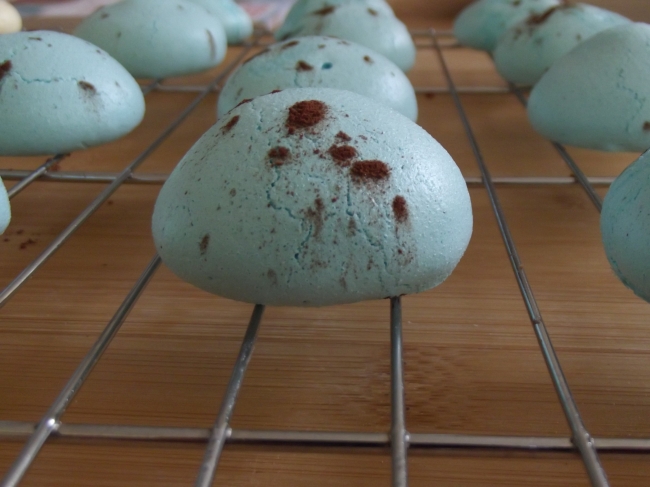
Blue meringues with cocoa powder
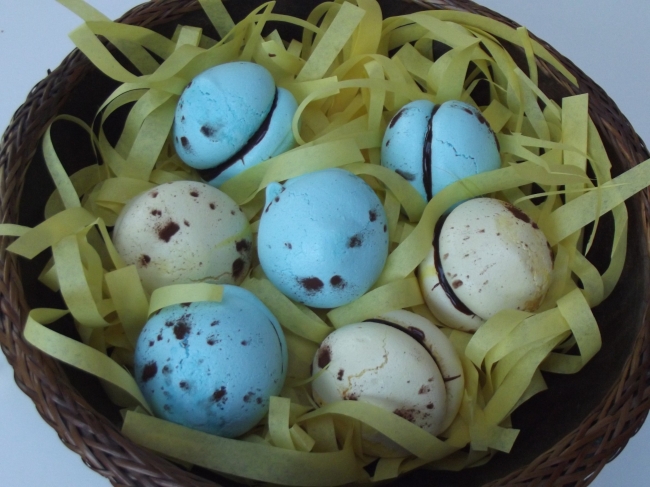
Finished meringue eggs!
Jammy Dodger Egg Shaped Shortbread
I asked my sister what she would like me to bake for her twins’ birthday party. She said biscuits…jammy biscuits. So of course I wanted to do an Easter-y theme so made egg shaped jammy dodgers! The recipe is nice and easy:
225g of margarine, 75g of icing sugar (sifted), 1 teaspoon of vanilla extract, pinch of salt, 225g of plain flour
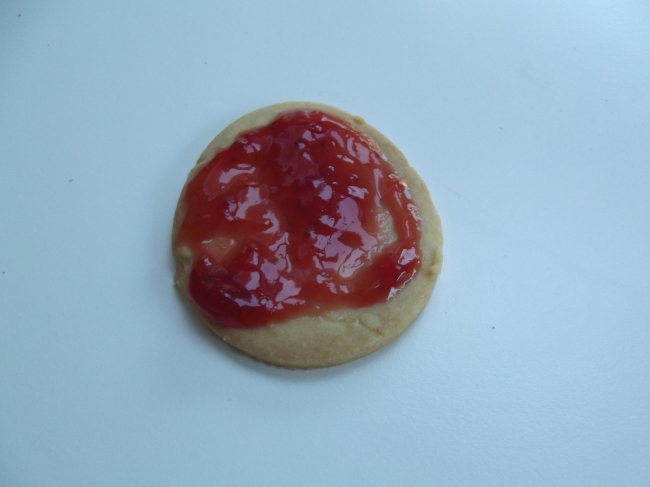
Mix up the marg and icing sugar, add the vanilla then the flour and salt. Mix in a mixer, or by hand in a big bowl (I am too lazy for that now… my mixer is my friend!). Scoop it all out, roll in some flour into a ball, wrap in cling film and stick in the fridge for a while…I did an hour to make sure it was firm. Roll it out in chunks – don’t try and do it all at the same time. Roll it to about 3mm thick…very thin I know, so make sure you put lots of flour on the surface! Cut out egg shapes (or whatever shapes you like) with a biscuit cutter. I did half with holes in (using a straw!), to look like spots on eggs for the jam to ooze out!
Bake at 180°C (preheated oven) for about 10-15 mins. Keep an eye on them so that they don’t burn or go too brown. Just a nice pale brown will do. Cool on a cooling rack and then get some jam (strawberry for me!) and spread on the hole-less biscuits. Put the holey ones on the top and squash! I can’t wait to try one of these! 🙂
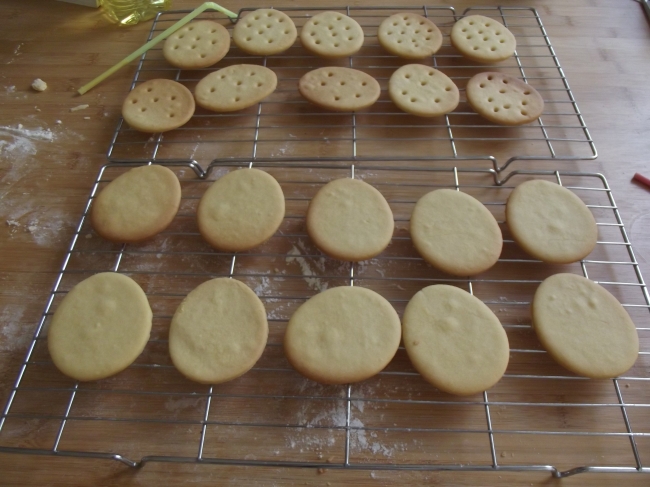
Biscuits ready to be jammed!
Jammy!
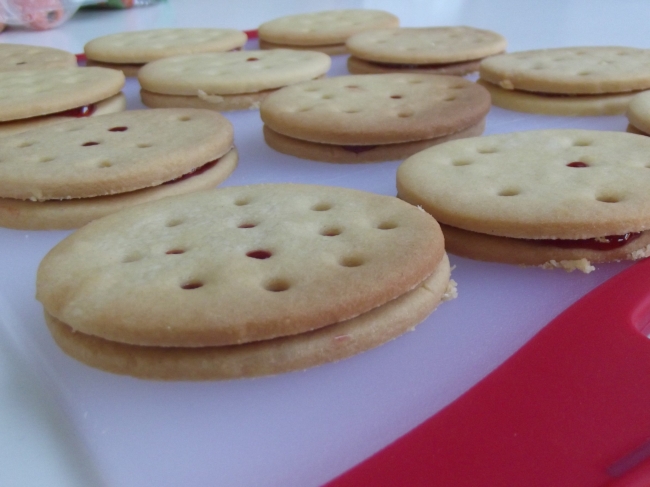
Jammy dodgers…Easter style!
Carrot and chocolate cake…but not what you think!
I do love a good carrot cake and I found a great recipe in a book called Delicious Gifts by Jess McCloskey…I’ll let you discover that one! The trick of this cake is that the carrot cake is hidden! So make a small amount of cake (just one 7″ square tin will do), let it cool and cut it into triangles – representing a carrot! Put them on a tray and place it in the freezer… we need those cakes to be frozen! When they are, make up a chocolate cake mixture (I did a standard Victoria sponge, 4oz of everything, 2 eggs and 1 tbsp of cocoa powder mixed with 2 tbsp of boiling water). Take the cakes out of the freezer, and place upside down in a loaf tin. Fill the surrounding areas with the chocolate sponge mixture and cook at 180°C. It takes a while…about 35 mins to make sure it cooks. It is a bit tricky around the frozen carrot cake, but it does eventually cook. Keep testing it with a cake tester until done. Leave to cool on a wire rack.
Cut off the top part so it is even and turn upside down so your carrots are the right way up! Cover with chocolate mixture (melted choc and double cream again) and grate over some chocolate to finish. Then to make the carrot tops, stick some green royal icing (I bought it pre-coloured….so much easier than making your own…take it from someone who has tried) and put through a garlic press! I then squashed one end and put a cocktail stick in it, and stuck 4 of these in the cake! I have to admit, I was very impressed. I think the colouring differences of the cakes needed improving though, so you can really tell the difference. It did however look rather good…even my rabbit approved!
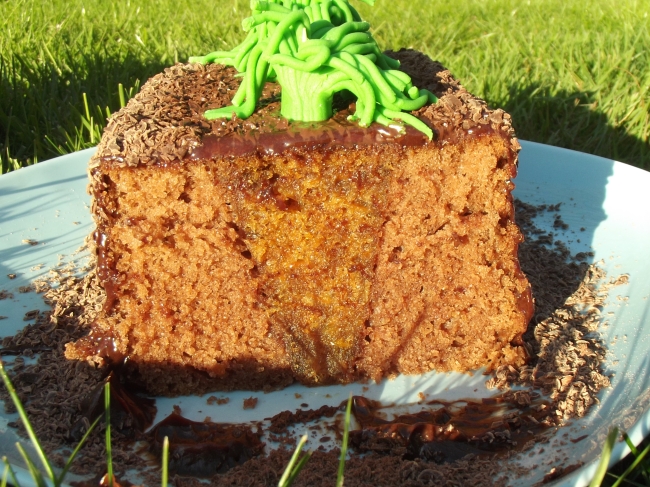
Carrot cake in the middle!
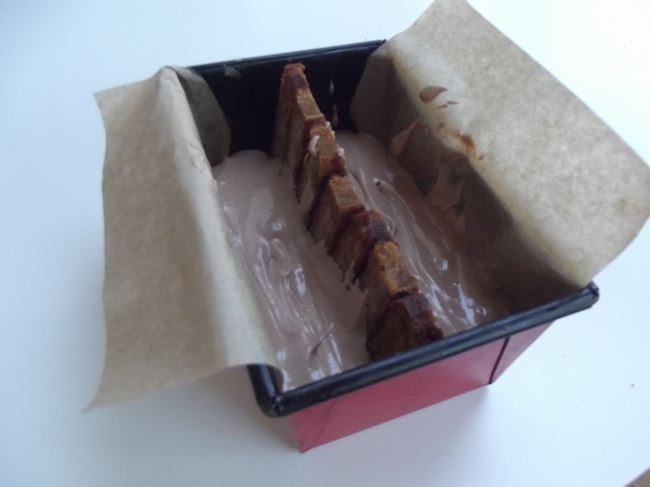
Frozen carrot cake with choc mixture
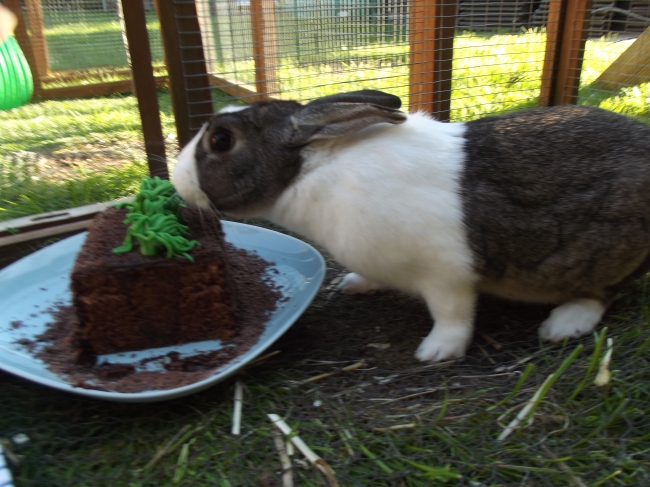
Simon seems to approve! Well I had to have a bunny in there somewhere for Easter!
All in all, I think I have done really well…I am so pleased. There are a lot of good entries so far (and why not give it a go yourself!), so I am not sure if mine will be anywhere near the top, but I really did have fun making the recipes up and being a bit creative. Perhaps I will do some more themed cakes in the future!
Happy Easter everyone! x
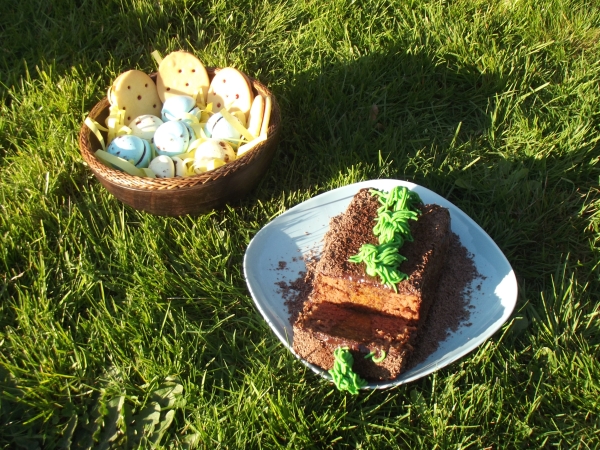
My final competition entry!


